
Alternatives to mason.nvim
Published at
Why?
First, I should say that mason.nvim really simplifies installing and managing tools; it covers a huge amount of packages. However, I’ve always been a fan of the Unix philosophy, “do one thing well,” and I find that an editor plugin handling system-level package management is outside of its ideal scope.
I still use mason.nvim on Termux because, unfortunately, it’s difficult to use these tools natively there. While you can use proot-distro, it is prohibitively slow.
You might be wondering why even bother? Well, mason.nvim’s approach to security and reproducibility is limited. It essentially downloads a package and adds it to your $PATH for Neovim to use. While convenient, it doesn’t offer robust version locking or integrity verification.
So if you’re looking for a separate tool for managing installations of language servers, formatters, linters and other cli tools, you may want to keep reading.
Alternatives
1. Default Package Manager
Most Linux distributions software repositories offer some tooling, but they are often outdated or incomplete, which is why mason.nvim exists.
It’s also possible to use language-specific package managers (e.g., npm install -g typescript-language-server). While straightforward, it requires manual upkeep and forces the user to manage updates for every tool individually.
One could argue that shell scripts can automate this process, but they tend to be brittle and break easily.
2.  mise-en-place
This tool is pretty much a more modern and faster asdf. It supports installing directly from GitHub and other services like GitLab and Codeberg. It works similarly to mason.nvim but is more flexible; since it operates at the shell level, you can use these tools with any editor, such as Helix or Sublime, not just Neovim (Any LSP compliant editor in general).
Mise identifies itself as a polyglot tool manager. It uses toml for configuration, making it easy to set up and maintain. Here is an example of what a configuration file looks like:
[tools]
# shell
shfmt = "latest"
shellcheck = "latest"
"npm:bash-language-server" = "5.6.0"
stylua = "latest"
"github:EmmyLuaLs/emmylua-analyzer-rust" = "latest"
ruff = "latest"
uv = "latest"
flutter = "latest"
gemini-cli = "latest"
node = "latest"
bun = "latest"
deno = "latest"
taplo = "latest"

[settings]
cargo.binstall = true
experimental = true
jobs = 4
npm.bun = true
paranoid = false
verbose = false
Installing mise
Here’s how to install mise on fedora
sudo dnf copr enable jdxcode/mise
sudo dnf install mise
It’s also possible to install mise from terra repos. Here’s how:
# add terra repository to dnf
sudo dnf install --nogpgcheck --repofrompath 'terra,https://repos.fyralabs.com/terra$releasever' terra-release
sudo dnf install mise
Terra comes with a lot more packages, so I suggest looking more into it.
Anyway, I’m not going to cover every linux distro/OS out there so consider looking at this page:
https://mise.jdx.dev/getting-started.html
And please don’t use curl for installing programs directly on your system!
After you’re done installing mise, you should load it into your shell:
# bash
echo 'eval "$(mise activate bash)"' >> ~/.bashrc
# zsh
echo 'eval "$(mise activate zsh)"' >> ~/.zshrc
# fish
echo 'mise activate fish | source' >> ~/.config/fish/config.fish
Global vs Project-Local Config
To install a package globally, run mise use -g <package>. Running mise use <package> without the -g flag will add it to a mise.toml in your current directory, making the tool available only when you are in that project.
3.  Brew/LinuxBrew
Brew is a popular alternative package manager written in Ruby. On Linux, it installs packages and their dependencies into a separate directory in your home folder. This isolation is convenient because it doesn’t interfere with your system libraries, though it does mean downloading extra copies of common dependencies.
It is very user-friendly, operating like a standard package manager. For example, you can simply run brew install lua-language-server.
It covers a wide range of language servers, linters, and formatters. However, there is one small drawback:
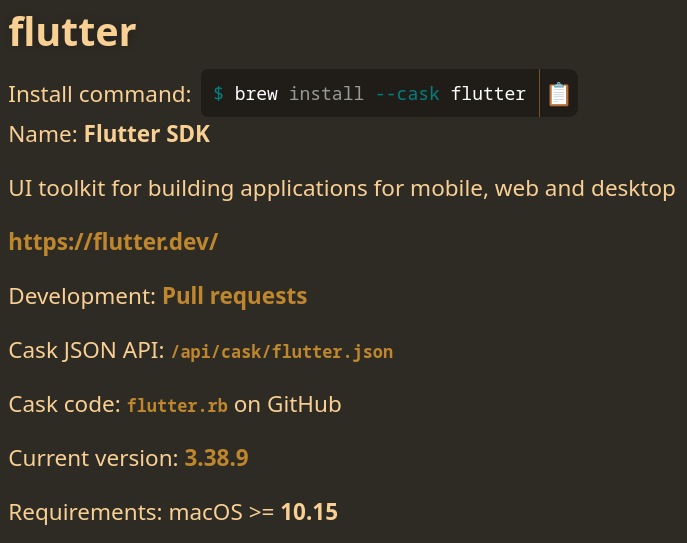
It favors macOS over other platforms sometimes.
4.  Nix Package Manager
Nix has a steeper learning curve because it uses its own functional language, but it isn’t as daunting as it might seem; however, the language wasn’t made with beauty in mind (bit of an eye sore sometimes).
A major advantage of the Nix package manager is its massive repository. It is one of the largest in the world! You can be rest assured that almost any tool you need is available.

On recent versions of Fedora (42+), you can install Nix directly from the official repositories. If you are on an older version, I recommend the Determinate Nix Installer.
Why don’t I use Nix? Personally, I find Mise easier to manage for my specific needs. I’ve had issues in the past where software compiled with Nix-installed tools couldn’t find necessary system libraries. I also prefer Fedora’s workflow over NixOS, having switched back after encountering hardware driver issues.
Similar to Brew, Nix pulls its own system libraries to ensure reproducibility. However, the sheer volume of dependencies it downloads can be overwhelming for slower internet connections. Perhaps that was the reason why my wifi card died 😅.

Okay I’ve been holding you from seeing how a nix config file looks like. Take a look:
{
  inputs.nixpkgs.url = "github:nixos/nixpkgs/nixos-unstable";
  outputs =
    { nixpkgs, ... }:
    let
      system = "x86_64-linux";
      pkgs = nixpkgs.legacyPackages.${system};
    in
    {
      packages.${system}.default = pkgs.buildEnv {
        name = "devtools";
        paths = with pkgs; [
          # LSPs
          lua-language-server
          nil
          nodePackages.bash-language-server
          nodePackages.typescript-language-server
          taplo
          tinymist
          vscode-langservers-extracted
          # Formatters
          nixfmt
          nodePackages.prettier
          shfmt
          stylua
        ];
      };
    };
}
It looks like over glorified json now that I think about it.
I’m pretty sure some nix fanatics are screaming right now because I’m using nix profile.
Trust me when I say, try to keep your config as small as possible. If you happen to be intrigued by the idea of nix and it’s philosophy, I guess you should just switch entirely to NixOS and perhaps try home-manager.
Bringing it into Neovim
Once you move away from Mason, you might wonder how to actually use these tools. Since mise, brew, or nix place binaries directly in your $PATH, integration is simpler than you might expect.
1. LSP Configuration
You no longer need mason-lspconfig.nvim. You can simply call the setup function for any server you’ve installed:
-- If 'emmylua_ls' is in your PATH, this just works
require('lspconfig').emmylua_ls.setup({})
I personally prefer defining my LSP configurations in lsp/ directory.
I simply grab those configurations from nvim-lspconfig repository and put them in lsp/:
-- lsp/emmylua_ls.lua (relative to neovim config directory)

---@brief
---
--- https://github.com/EmmyLuaLs/emmylua-analyzer-rust
---
--- Emmylua Analyzer Rust. Language Server for Lua.
---
--- `emmylua_ls` can be installed using `cargo` by following the instructions[here]
--- (https://github.com/EmmyLuaLs/emmylua-analyzer-rust?tab=readme-ov-file#install).
---
--- The default `cmd` assumes that the `emmylua_ls` binary can be found in `$PATH`.
--- It might require you to provide cargo binaries installation path in it.

---@type vim.lsp.Config
return {
    cmd = { "emmylua_ls" },
    filetypes = { "lua" },
    root_markers = {
        ".luarc.json",
        ".emmyrc.json",
        ".luacheckrc",
        ".git",
    },
    workspace_required = false,
}
And then call vim.lsp.enable({...}) in init.lua:
-- ...
vim.lsp.enable({
  "emmylua_ls",
})
-- ...
2. Formatting & Linting with Guard
While many people use conform.nvim + nvim-lint combo, I personally recommend guard.nvim by nvimdev. It is a lightweight, async formatting and linting plugin that is extremely easy to configure once your tools are globally available.
Here’s how to install and configure it using lazy.nvim plugin manager:
---@type LazySpec
return {
    "nvimdev/guard.nvim",
    dependencies = { "nvimdev/guard-collection" },
    lazy = false,
    init = function()
        vim.g.guard_config = {
            always_save = false, -- always save file after call Guard fmt
            auto_lint = true, -- automatic linting
            fmt_on_save = false, -- format on write to buffer
            lint_interval = 500, -- how frequently can linters be called
            lsp_as_default_formatter = true, -- use lsp if no formatter was defined for this filetype
            refresh_diagnostic = true, -- show diagnostic after format done
            save_on_fmt = false, -- whether or not to save the buffer after formatting
        }
    end,
    config = function()
        local ft = require("guard.filetype")

        ft("bash"):fmt("shfmt")
        ft("dart"):fmt("lsp")
        ft("fish"):fmt("fish_indent")
        ft("lua"):fmt("stylua")
        ft("rust"):fmt("rustfmt")
        ft("toml"):fmt("taplo")

        ft("markdown"):fmt({
            cmd = "deno",
            args = { "fmt", "--ext=md", "--prose-wrap=preserve", "-" },
            stdin = true,
        })
    end,
    keys = {
        { "<localleader>df", "<cmd>Guard fmt<cr>", desc = "format (guard.nvim)", mode = { "n" } },
    },
}
My Recommendation
Start with mise. It is really easy and simple to use. You can use it like a regular package manager or specify your packages in the config file.
Mise does more than just package management. It also has a builtin task runner which I find really good and can store/manage environment variables in the config file.